

")


10 minute makeup routine
Motherhood is beautiful—but let’s be real, it’s also exhausting. Between school drop-offs, snack requests, and trying to get a workout in, there’s not always time to sit and do a full face of makeup. But I still want to feel good, and look put together (even if I only got four hours of sleep). That’s why I’ve fallen in love with this super simple, glowy makeup routine that takes just 10 minutes—start to finish.

It’s quick, fresh, and most importantly, doable. This is my go-to for school mornings, errand days, and even those surprise FaceTime calls when you weren’t expecting anyone to see your face.
The Goal: Fresh, Glowy, and Awake
I’m not aiming for full glam here. This routine is all about looking awake, radiant, and like I didn’t just roll out of bed (even though, let’s be honest, I probably did). It’s light on the skin, hides what I want to hide, and highlights what I want to glow.
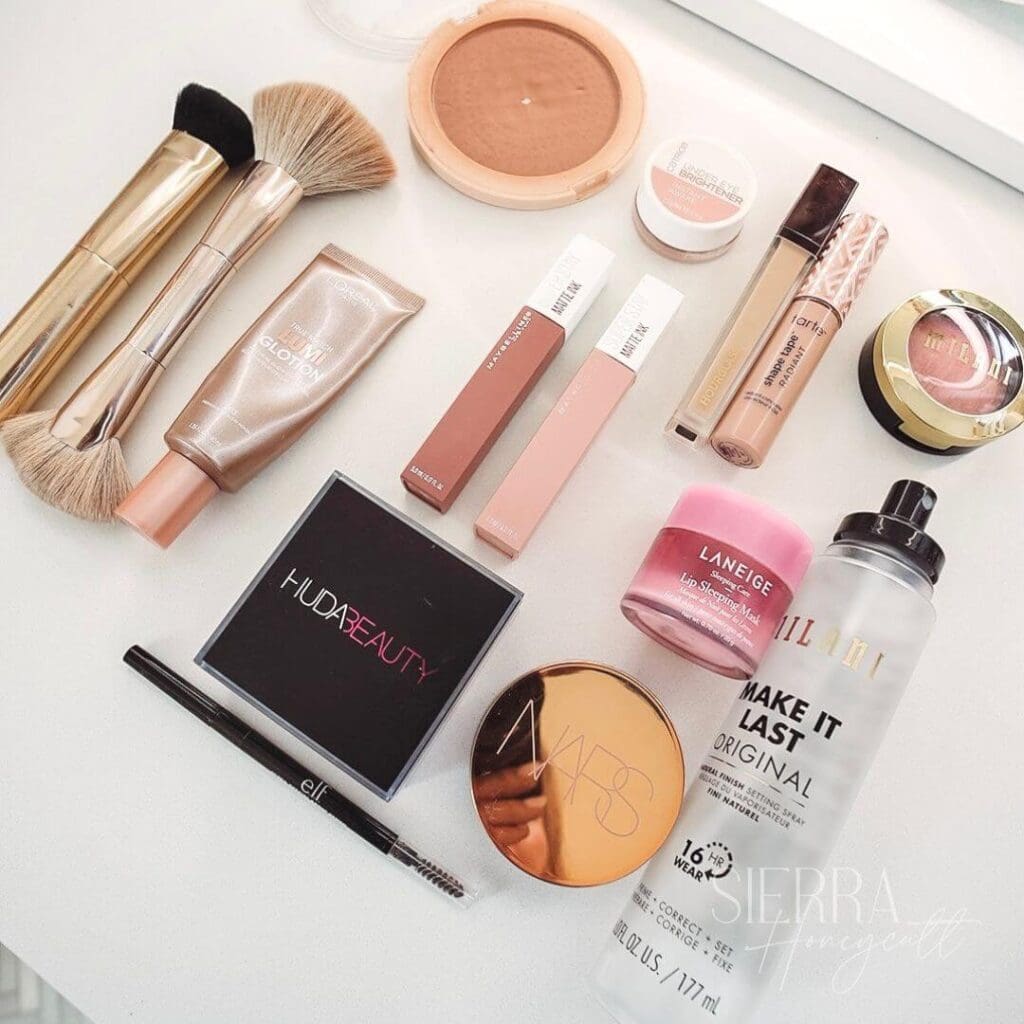
SHOP MY FULL MAKEUP ROUTINE HERE
Step 1: Glow Without the Weight
Foundation? Not today. I’ve been dealing with a little hormonal acne, and honestly, I’m not in the mood to layer on heavy product. Instead, I start with a lightweight glotion—a glow-enhancing lotion that gives my skin a pretty, radiant base without feeling cakey. It evens things out and gives that “lit from within” look without covering everything up.
Step 2: Hydrate Those Lips
Next up, I realized my lips were seriously dry—like, cracked and begging for mercy. So I grabbed my trusty lip sleeping mask and used it like a balm. It gives instant moisture and a soft, glossy finish. I’ll let that sit and do its thing while I work on the rest of my face.
Step 3: Color Correcting Magic
Let’s talk about under-eye circles. I used a color corrector to cancel out the dark tones before applying any concealer. This one step makes a huge difference—it’s like giving your face a little caffeine shot. I keep the product light but effective, just enough to brighten up the eye area.
Step 4: Strategic Concealer
I skip foundation, but I never skip concealer. I apply it in a strategic pattern: under the eyes, on the high points of my face (like the forehead and chin), and on any blemishes that need a little coverage. It gives me that natural, lifted look while still letting my skin breathe.
I also use a lighter concealer shade on my eyelids for a quick brightening effect. It opens up the eyes and helps me look more awake.
Don’t blend everything in yet, trust me!
Step 5: Lock It In with Setting Spray
Before I start blending, I actually give everything a good mist with setting spray—it helps my makeup last longer and gives a dewy finish. While the spray is still damp, I go in with my beauty blender and then gently blend everything out, saving the eye area for last. This helps everything melt together seamlessly.
Step 6: Cream Bronzer for Warmth & Definition
Cream bronzer is my best friend. I swipe it across my forehead, cheekbones, and even down the sides of my nose. It adds warmth and soft sculpting without harsh lines or needing a ton of blending. It’s quick, easy, and really pulls the look together.
Step 7: Setting Powder Where It Counts
I’m not a fan of an overly matte face, but I do like to set certain areas. I use setting powder only where I applied concealer—under my eyes, around my nose, and chin—to keep things in place and prevent creasing. You can also lightly dust some powder bronzer over the cream bronzer to set it and add a little more dimension. I even use the bronzer as a quick swipe of eyeshadow to warm up my eyelids.
Step 8: Brows & Lashes
I do DIY lash extensions that last all week (life-changing!), so I don’t need mascara on the top lashes. But I always swipe a little on the bottom lashes for balance. Then I quickly fill in my brows—nothing dramatic, just enough to give some shape and definition.
Step 9: Blush, Highlight, and That Glow
This is my favorite part—adding life back into the face! I use a glowy blush and a soft highlighter on my cheekbones, temples, and even a touch on the tip of my nose. It gives such a pretty, radiant finish that makes everything look fresh and youthful.
Step 10: Quick Lip Combo
I keep my lips simple but pretty. I do a two-step lip combo: start with a darker shade, blot it off a little, then go over it with a lighter shade. It lasts forever and gives just enough color without being fussy. I don’t always do this step if I’m just running around, but it’s perfect for days I want a little something extra.
The Finished Look
Ten minutes later and I feel like myself again. Glowy, awake, and ready for whatever the day throws at me. Whether it’s school pickup, a Target run, or just hanging out at home—I love having this quick routine in my back pocket.
It’s low-maintenance, mama-friendly, and it really helps me feel like I started my day with intention (even if I’m still in leggings and have dry shampoo in my hair).

Want to shop everything I used? You can find all the products I love right here.
Let me know if you try this routine! I’d love to hear what your favorite go-to makeup products are for a quick and easy glow.


Leave a Reply